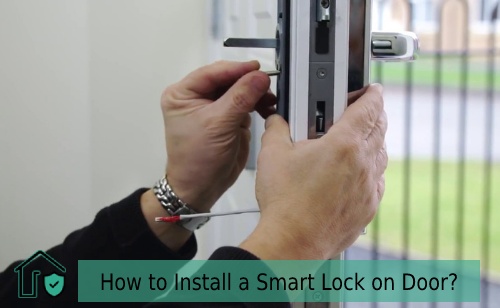
Not Sure How to Install a Smart Lock on Door? (Check This Guide)
by Vincent Foster
If you are still not aware of the whole smart lock craze that’s going on in literally every modern household, then you’re definitely living under a rock. It’s hard to find a human who has never heard about Google home door lock at least.
This very popular security technology has made home life easy peasy lemon squeezy. Why? Because it’s full-on smart. No keys, no need to be present for attending a guest and even remotely controlling facilities. However, once you get your hands on this fabulous security gadget after a long ponderation on choosing the best one, war is not over my friend.
Then comes the thought of how to a install smart lock on the door, something you may not know. And to make you aware of that here’s a quick and simply explained guide on the whole matter.

A Detailed Guide on How to Install Smart Lock on Door the Right Way
Knowing the proper way of how to install a smart door lock should first start by checking the provided manual. Most probably you will get clear instructions on it. But sometimes instructions with a lock are very straightforward where you need a bit more detailed information.
For example, when you are trying to install a Homekit compatible door lock, not being able to understand the included short word instructions is going to feel super annoying.
And that’s where today’s guide comes in help. From the start to finish, there will be all the steps discussed in easy words, that will seem helpful to you hopefully…
Get the Old One Out

The new smart lock cannot get into its place. Until you get the old one out of the scenario. If the previous lock system is a standard one, then removal process should be easy enough. You just need some access to the inside of your home. There should be two screws located right onto the inside thumb turn portion. Unscrew these using a compatible screwdriver.
You also need to get the door out if not already. Then go towards the locks’ front part. This is usually where you will insert the key. At this point, the assembly should be loose enough. Pull and take it off.
A bolt should be staying right onto the door side that slides whenever you lock it. You need to get this bolt assembly out too. Simply unscrew the two screws that are there and pull the assembly out.
Inserting Your New Locks Bolt
The bolt of your new lock needs to go inside the door frame. You must ensure the top area is facing upwards when sliding bolt in. Also, the bolt interior should center well with the door. You can simply peep through the hole in your door to check that.
The assembly should come with three assemblies. All three need to be closer to the center as much as possible. If for some reason they are not, you need to shorten or lengthen the bolt. This will highly depend on the current length. And this will make it center easily.
To do so you simply need to work with the available bolt mechanism. Also using a screwdriver can help. To lock the bolt in its place you need to insert two screws.
Inserting the Assembly
Now you need to work with the lock’s outdoor assembly part. Make sure to have a check on the electronic wire as well as a long thin bar. Carefully start inserting the assembly into your door. Make sure the thing bar is threading well through-bolt assembly’s middle hole.
It must be the only bar holding bar fit. Beneath the bolt hardware, next, you need to side the wiring. There should be no pinching to wiring by hardware here.
If you have a smart lock assembly with tall keypads, it can seem to fall out of the door. And these common things to happen. Simply use a double-sided sticky tape for now. So that it can stay in place until you have finished the installation and fixed it properly.
Wiring the whole thing
No matter if it’s a Bluetooth enabled door lock or the Smart wifi deadbolt lock some wiring is necessary for their installation. You need to find the plate that goes right against door interior. It could be made of steel or plastic. From the front assembly get the wire to run through it. Get two long screws after that and use them for holding the bolt assembly to the front one. So that everything is securely in its place.
There are also some locks that use no metal plate. You just attach the inside assembly with two long screws in such a case. Get the wire from outdoor plate and let it go through interior assembly. There should be a channel for this. So that there’s no pinching after you run wiring.
After connecting wires, you need to grab the interior lock on the door. Use screws and secure them in place. And finally, you need to insert the batteries. The lock should turn on and for the first time, it will test the door facing way.
The thing will lock and unlock quite a few times. And once it is done with the process, you can connect or pair it with your apps. Go ahead and set the PINs if you are using a keypad included smart lock.
Related Guide You may check:
- Are Smart Locks Safe? Things You Need to Know Before Buy!
- August Smart Lock Pro Vs Yale Assure Smart Locks
- 4 Common Types of Smart Door Locks You Need to Know About!
- How Do Smart Locks Work & Should You Get One!
Wrap up
And now you know how to install a smart lock on door. Smart locks are indeed a great relief in the modern days as it helps to cut down many activities you and I could have wasted time on.
Your house cleaning person won’t need you to be physically present in the house for them to enter. As you can let them have an entrance code that only they’ll know and use to get access. Also locking yourself outside your house will never be a case. And the list is long. Just make sure to get the installation completed properly. And you’ll be able to enjoy all that for your life.
 |
 |
 |
 |

About Vincent Foster
Greetings, This is Tom Vincent. I’m a home Security Expert and Web developer. I am a fan of technology, home security, entrepreneurship, and DIY. I’m also interested in web development and gardening. I always try to share my experience with my reader. Stay Connected and Keep Reading My Blog. Follow Me: Facebook, Twitter, Pinterest
Thoughts on "Not Sure How to Install a Smart Lock on Door? (Check This Guide)"
 |
 |
 |
 |
Now you can get FREE Gifts. Or latest Free Security Cameras here.
Disable Ad block to reveal all the gifts. Once done, hit a button below
 |
 |
 |
 |