Studies show that poorly controlled doors are responsible for more than 2 million injuries in the United States every year — and a large share of those happen right at the threshold. If you've ever watched a door swing back and slam into someone, or noticed a draft because your entryway door never quite closes all the way, you already understand the problem. Knowing how to install a door closer is one of the most practical DIY upgrades you can make, and it fits naturally into a broader door installation plan for your home. Most homeowners can complete the job in an afternoon with basic tools.
Door closers aren't reserved for office buildings or commercial entrances. Residential models have become affordable, compact, and genuinely easy to work with. They solve three problems at once: safety, energy efficiency, and security. A door that doesn't reliably latch is a gap in your home's defense — and no smart lock or alarm system makes up for a door that won't stay closed.
This guide covers everything you need to know: when a closer makes sense (and when it doesn't), what tools to gather, how the installation actually works, how to keep it running for years, and a few myths that might be holding you back from getting started.
Contents
Signs It's Time to Install a Door Closer
When a Closer Is the Right Call
The clearest signal is a door that swings open and stays there. If you have kids, pets, or a garage entry that connects to your living space, that's a genuine hazard and a security liability. A closer takes the decision out of everyone's hands — the door shuts and latches every time, automatically.
Energy loss is another strong reason. A door that drifts open, even slightly, bleeds conditioned air and drives up your utility bill. Storm doors and exterior doors in windy locations are especially prone to this. A closer costs far less than a season's worth of wasted heating or cooling.
Security is the third factor, and arguably the most important. Before you invest in upgrades like installing a smart lock, make sure the door itself closes reliably every time. A closer is the foundation everything else builds on. An unlocked but reliably closed door is far safer than a locked door that doesn't fully latch.
When You Might Want to Skip It
Not every door is a candidate. Interior doors in living spaces — bedrooms, home offices, bathrooms — usually don't need one, and the constant automatic closing can feel intrusive in daily life. If a door is meant to stay open most of the time, a closer works against you rather than for you.
Also think about door condition before you buy anything. A warped door, a damaged frame, or a door that doesn't fit its opening properly won't be fixed by a closer. If you're already considering a bigger project like replacing the front door entirely, wait until the new door is in before adding the closer. Sequence matters.
Tools and Materials You'll Need
Your Basic Tool Kit
You won't need anything specialized. Most installations require tools you already own. Before you start, get a basic understanding of how your door hardware works — knowing where the latch sits helps you position the closer bracket without interfering with existing components.
- Power drill with Phillips and flathead bits
- Measuring tape and pencil
- Small torpedo level
- Adjustable wrench or Allen key set
- Mounting template (included in the closer packaging)
Choosing the Right Closer for Your Door
Door closers are graded by the weight and width of the door they're designed to handle. Buying the wrong grade is the most common mistake — too light and the door won't close reliably, too heavy and the closing force stresses the frame over time. Here's a simple reference to guide your purchase. For more background on grading standards, the Wikipedia entry on door closers covers the technical specs clearly.
| Door Weight | Door Width | Recommended Grade | Typical Use |
|---|---|---|---|
| Up to 50 lbs | Up to 36" | Grade 3 | Light interior or storm doors |
| 50–75 lbs | 36"–42" | Grade 2 | Standard exterior doors |
| 75–100 lbs | 42"–48" | Grade 1 | Heavy exterior, high-traffic |
| Over 100 lbs | 48" and wider | Commercial grade | Wide or accessibility-compliant entryways |
For most residential front doors, Grade 2 hits the sweet spot. If you're unsure of your door's weight, most manufacturers publish specs, or you can weigh it roughly by resting it on a bathroom scale during a hinge swap.
DIY vs. Professional Installation
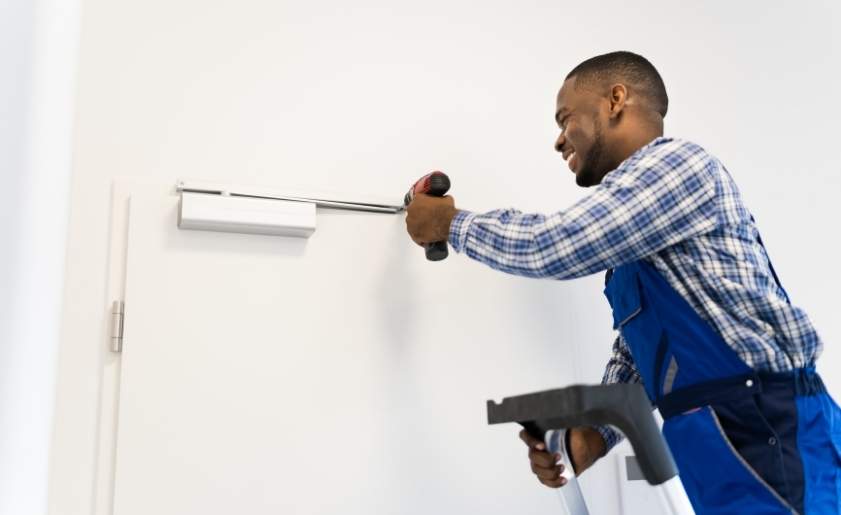
The Basic Installation Process
Here's the thing about how to install a door closer: it's methodical, not difficult. The template does most of the thinking for you. Tape the mounting template to the top of the door and frame, use your level to make sure it's straight, then mark all the screw holes with a pencil. Drill pilot holes at every mark — pilot holes prevent the wood from splitting and make driving screws much cleaner.
Attach the door bracket first, then the frame bracket. Once both are secure, connect the arm — the adjustable metal bar that links the two brackets. Parallel arm mounting (where the arm folds back along the door face) is the most common residential configuration and the easiest to install. Once the arm is connected and bolted at both ends, open and close the door a few times to feel how it behaves before touching any adjustments.
The closer body has adjustment valves, typically labeled "sweep" (overall closing speed), "latch" (the final snap into the frame), and sometimes "back check" (resistance when opening hard). Use a small flathead screwdriver and make quarter-turn adjustments at a time. This same patient, incremental approach applies to any door hardware project — it's the same discipline you'd bring to installing a door handle set for the first time.
Pro tip: Adjust the latch valve last. A door that closes fine but doesn't fully latch is almost always a latch speed issue — not a sweep speed problem.
When Things Get More Complicated
A few scenarios genuinely call for professional help. Steel door frames require specialized drill bits and toggle bolts — standard wood screws won't bite. Hollow-core doors need blocking or solid-wood inserts at the mounting location or the screws will pull out under repeated use. If you're working with either of these, getting the substrate right matters more than anything else.
ADA (Americans with Disabilities Act) compliance adds another layer. Accessible entrances must open with no more than five pounds of force, which means the closer adjustment isn't just about comfort — it's a legal specification. If your home has accessibility requirements, a contractor familiar with accessible hardware is worth hiring for this particular job.
Keeping Your Door Closer in Top Shape
Routine Checks
A well-installed closer can last 10 to 15 years with minimal upkeep. Every six months, check that all mounting screws are tight. Daily door use vibrates screws loose over time, and a loose bracket stresses the arm connections unevenly. A two-minute check with a screwdriver catches this before it causes bigger problems.
Also look for fluid leaks around the closer body. Hydraulic closers use internal fluid to control speed, and a dark oily streak near the end cap is a sign the seals are failing. At that point, replacement is more practical than repair — a new residential closer typically costs between $30 and $80.
Common Fixes
If the door is closing too fast, turn the sweep valve clockwise — small increments only. Too slow, turn counterclockwise. If it's not latching fully, tighten the latch valve. If the arm pivot points squeak, apply a drop of white lithium grease or proper door lubricant. Avoid WD-40 here — it's a cleaner and solvent, not a long-term lubricant, and it breaks down the grease that's already there.
Once your closer is dialed in, your entryway security picture becomes much clearer. Pairing a reliable closer with one of the right types of deadbolts for your door gives you layered protection that's both automatic and lockable — two things that work together rather than separately.
Door Closer Myths Worth Busting
Myth: Closers Are Only for Commercial Doors
This one comes up constantly, and it's simply not true. Storm doors on residential homes have used closers for decades. Today's residential units are quieter and more compact than their commercial counterparts, and they're built specifically for home use. If you've been putting this off because it seemed like overkill for a house, you can let that concern go. A closer is just a practical piece of hardware — not a commercial-grade statement.
Myth: Any Closer Will Fit Any Door
Sizing actually matters quite a bit. An undersized closer won't generate enough spring tension to reliably shut a heavy door. An oversized one slams a light door so forcefully that it wears out the frame and hinges ahead of schedule. Matching the closer grade to your door's actual weight and width is the single most important purchase decision you'll make in this project. Take two minutes to look up your door's specs or weigh it before you buy — it saves a return trip to the hardware store and a reinstall.
Frequently Asked Questions
How long does it take to install a door closer?
For most people doing it for the first time, plan on 45 minutes to an hour. Once you've done it once, you can usually complete a second installation in 20 to 30 minutes. The adjustment phase — dialing in the sweep and latch speeds — takes the most time if you want it to feel just right.
Can I install a door closer on a hollow-core door?
You can, but you need to add solid backing behind the mounting points. Hollow-core doors don't have enough material to hold screws under repeated stress. A piece of solid wood glued into the hollow cavity at the bracket location solves the problem before you start drilling.
What's the difference between a hydraulic and pneumatic door closer?
Hydraulic closers use fluid to control closing speed and are the standard for most residential and commercial applications — they're smooth, adjustable, and durable. Pneumatic closers use air and are typically found on screen or storm doors. They're less adjustable and don't last as long, but they work fine for lightweight applications.
Do door closers work in cold weather?
Most do, but hydraulic fluid thickens in very cold temperatures, which can make the closer slow down significantly. If your closer is on a door exposed to freezing temperatures — like an unheated porch or garage — look for a model rated for low-temperature use. Some manufacturers specify a usable temperature range right on the packaging.
Can a door closer be installed on a door that swings outward?
Yes. You'll use a different arm configuration — typically a top jamb or parallel arm mount — depending on where the hinge side is and which direction the door opens. Your closer's included instruction sheet will show the configuration options, and most residential closers support both inswing and outswing installations.
How do I know if my door closer needs replacing rather than adjusting?
Visible fluid leaks and a body that's cracked or bent beyond adjustment are the clearest signs. If you've maxed out the adjustment valves and the door still slams or won't latch, the spring inside is likely worn out. At that point, replacement is the right call — repair isn't typically practical or cost-effective for residential units.
Will a door closer make it harder for elderly family members to open the door?
It can, if the backcheck or spring tension is set too high. The good news is that most residential closers let you dial down the opening resistance significantly. Start with the lowest spring setting and increase only if the door isn't closing reliably. The goal is the lightest closing force that still gets the job done every time.
Do I need to remove the door from its hinges to install a door closer?
No. Door closer installation is done with the door in place and hung. You work from the top of the door face and the top of the door frame — both accessible while the door is still on its hinges. Removing the door would actually make the job harder, since you need to test the closing action repeatedly during adjustment.
Next Steps
- Measure your door's width and estimate its weight, then use the grade table above to identify the right closer for your specific door before purchasing anything.
- Gather your tools — drill, level, measuring tape, and Allen keys — and read through the full instruction sheet that comes with your closer before you pick up a drill.
- Install the closer using the included mounting template, drilling pilot holes at every marked location, and attaching the door bracket before the frame bracket.
- Adjust the sweep and latch valves in small increments — quarter turns at a time — until the door closes smoothly and latches every single time without slamming.
- Schedule a check-in every six months to tighten mounting screws and look for any signs of fluid leakage, so your closer keeps working reliably for years to come.


About Vincent Foster
Greetings, This is Tom Vincent. I’m a home Security Expert and Web developer. I am a fan of technology, home security, entrepreneurship, and DIY. I’m also interested in web development and gardening. I always try to share my experience with my reader. Stay Connected and Keep Reading My Blog. Follow Me: Facebook, Twitter, Pinterest
Now you can get FREE Gifts. Or latest Free Security Cameras here.
Disable Ad block to reveal all the gifts. Once done, hit a button below