Last spring, a neighbor ordered a steel security door online — he measured the door slab itself, not the frame — and it arrived three inches too narrow. The return shipping cost him over a hundred dollars and two weeks of waiting. Learning how to measure a front door correctly before you buy anything prevents exactly that kind of expensive mistake.
Whether you're replacing a worn-out entry door, shopping for a high-security front door, or fitting new smart lock hardware, the measurements you take today determine whether everything installs cleanly — or turns into a return-shipping nightmare. The good news: the whole process takes about 15 minutes with a metal tape measure and a notepad.
This guide walks you through all six steps — width, height, thickness, rough opening, frame square, and hardware dimensions — so you end up with numbers you can actually use at the hardware store or when placing an order online.
Contents
Why Getting Measurements Right Changes Everything
Ordering the wrong door — even by a quarter of an inch — means you're either forcing a fit that compromises your weather seal, or packing everything back up and starting over. The single most common mistake is measuring the door slab when you should be measuring the rough opening. These are two entirely different numbers, and mixing them up is why most door-ordering errors happen.
Door Size vs. Rough Opening
The door slab is the door panel itself — the flat piece that swings open. The rough opening is the total framed space in your wall — the structural hole your door sits inside. They are never the same measurement. Here's what fills the gap between them:
- The door frame (also called the jamb) on all three sides
- Shimming material used during installation for leveling and plumb
- Weather stripping and seals around the perimeter
As a standard rule, a pre-hung door unit needs a rough opening that's approximately 2 inches wider and 2 inches taller than the door slab. A 36" × 80" slab requires a rough opening of roughly 38" × 82". If you order based on the wrong dimension, nothing will fit correctly.
Standard Front Door Sizes at a Glance
Before you measure, it helps to know what the standard options look like. If your measurements land in one of these ranges, you're working with a standard-size opening — and your replacement options are wide open. If they don't, you're dealing with a non-standard situation covered later in this guide.
| Door Type | Standard Width | Standard Height | Best For |
|---|---|---|---|
| Single entry (narrow) | 32" | 80" | Older homes, side entrances |
| Single entry (standard) | 36" | 80" | Most modern homes |
| Single entry (tall) | 36" | 84"–96" | Homes with high ceilings |
| Double entry door | 60"–72" | 80"–84" | Grand entryways, large openings |
| Pre-hung unit (varies) | Slab width + 2" | Slab height + 2" | Full replacement with new frame |
If your home was built before 1960, never assume it matches any of these dimensions. Older homes frequently have non-standard openings. For a deeper look at how sizing varies by home type, see our guide on standard front door dimensions.
How to Measure a Front Door: The 6 Easy Steps
Grab a metal tape measure (not cloth — cloth stretches and skews your numbers), a pencil, and a notepad. Measure everything three times. When you get slightly different numbers across three points, record the smallest — that's your safest working measurement.
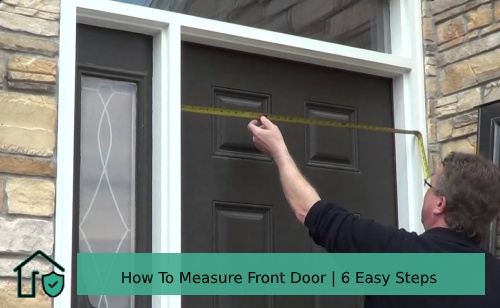
Step 1 — Measure the Width
Measure the door slab from its left edge to its right edge at three points: the top, the middle, and the bottom. If you're measuring the rough opening instead, measure between the two inner vertical framing members (called jack studs) at those same heights.
- Always measure at three heights — top, middle, bottom
- Write down all three numbers
- Use the smallest measurement when ordering — it ensures the door fits even at the tightest point
Step 2 — Measure the Height
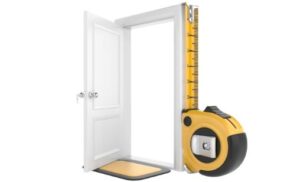
Measure from the top of the door slab straight down to the bottom at three points: the left edge, the center, and the right edge. For the rough opening, measure from the subfloor to the underside of the header (the horizontal framing board above the opening).
- Left edge, center, right edge — measure all three
- Do not include the threshold in the measurement unless you're replacing it too
- Record the smallest of the three heights
Step 3 — Measure the Thickness
Open the door and look at its edge — the narrow side that faces the frame when closed. This is your door's thickness. It determines which locks and reinforcement hardware will physically fit.
- 1¾" — the standard for most modern residential exterior doors
- 1⅜" — common in older homes or on lighter-duty doors
- 2¼" and up — heavy-duty or security-rated doors
This number matters for lock compatibility. The type of deadbolt you install — and any smart lock you add — must match your door's exact thickness. A lock built for 1¾" won't seat flush on a 2¼" door, and forcing it creates a weak point in your security.
Step 4 — Measure the Rough Opening
If you're ordering a pre-hung door unit (which comes with its own frame already attached), manufacturers need your rough opening — not the slab dimensions. Here's how to find it:
- Remove the interior door stop molding if it's covering the structural framing
- Measure width between the two jack studs at the top, middle, and bottom of the opening
- Measure height from the subfloor (not the finished flooring) to the underside of the header
- Record all measurements and note the smallest for each dimension
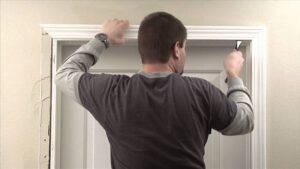
Step 5 — Check the Frame for Square
A frame that isn't square causes gap problems, poor latching, and drafts. To check squareness, measure both diagonals of the opening — corner to corner, in both directions. If the two diagonal measurements are equal, your frame is square. If they differ by more than ¼ inch, plan for shimming — or call a framing carpenter before you order.
Step 6 — Measure for Hardware
Before shopping for any lock, handle, or smart device, get these three measurements off your existing door:
- Backset: the distance from the door edge to the center of the lock borehole — most commonly 2⅜" or 2¾"
- Cross bore diameter: the large hole in the door face, typically 2⅛" for standard hardware
- Hinge placement: measure from the top and bottom of the door to the center of each hinge leaf
Get these right and your new hardware installs into existing holes without any drilling. Get them wrong and you're filling holes and drilling new ones — a frustrating, avoidable problem.
When Your Numbers Don't Add Up
Even careful measurements sometimes reveal a problem. Here's how to work through the most common ones before you order anything.
Out-of-Square Frames
If your diagonal measurements don't match, the opening is out of square. How far off it is determines your next move:
- Under ¼" difference: use shims during installation — this is normal and manageable on your own
- ¼" to ½" difference: shimming may still work, but consult a contractor before proceeding
- Over ½" difference: hire a framing carpenter to correct the opening before ordering anything new
Out-of-square frames are common in homes with any foundation settling — especially homes over 30 years old. Don't try to muscle a square door into a non-square opening. You'll warp the slab, destroy the weather seal, and create security gaps that undercut everything else you're trying to accomplish.
Non-Standard Openings
If your measurements don't match any standard size, you have two real paths forward:
- Order a custom door — many manufacturers build to spec. Expect a higher price and a lead time of 4–8 weeks depending on the manufacturer.
- Adjust the rough opening — a contractor can widen or narrow the framing to accept a standard door, though this adds labor cost and disruption.
It's worth knowing that according to the U.S. Department of Energy, poorly fitted exterior doors are one of the leading causes of residential heat loss. A custom-fit door that seals properly pays back in energy savings over time — especially in climates with harsh winters.
Keeping Your Door Frame Measurement-Ready
Measuring your door once doesn't mean your numbers are accurate forever. Frames shift. Wood swells with humidity. Foundation settling happens gradually. The measurements you took two years ago may not reflect what's actually there today.
Signs of Frame Damage to Watch For
Inspect your door frame every season. Look for these specific warning signs:
- Visible gaps between the door edge and the frame — anything over ⅛" is a problem
- Soft or spongy spots in wood frames — this almost always means rot or moisture damage
- Paint cracking or bubbling along the frame edges
- The door sticking or dragging when you open it, especially in summer humidity
- Daylight visible around the closed door edges
- The latch not catching cleanly in the strike plate
Any of these signs mean your frame has likely moved since your last set of measurements. Re-measure before purchasing any new hardware or planning a replacement.
When to Re-Measure
Build re-measuring into your standard home maintenance routine. Re-measure your door whenever:
- You notice new drafts or gaps around the frame that weren't there before
- After a significant weather event — flooding, a hard freeze, or a prolonged drought
- Before purchasing any door hardware, including smart locks or deadbolts
- Every 3 to 5 years in homes older than 30 years
Keep a written record of your measurements with the date. Store it in a home maintenance binder or snap a photo and save it in a cloud folder. You'll be glad it's there the next time you need it.
Using Your Measurements to Plan a Security Upgrade
Once you have accurate numbers in hand, you're not just set for a door swap — you're positioned to make smarter decisions about every security upgrade you add. Your measurements are the foundation every security purchase depends on.
Matching Hardware to Your Door Dimensions
Your door's thickness and backset determine hardware compatibility. A 1¾" door with a 2¾" backset fits most standard deadbolts and smart locks available today. But if your door is non-standard, you need to verify compatibility before spending anything.
Run your measurements against the specs for each of these before you buy:
- Smart deadbolts — most are rated for 1⅜" to 2" door thickness; check the manufacturer spec sheet
- Keypad and biometric locks — some require specific backsets or cross bore diameters not covered by adapters
- Door reinforcement kits — sized to door thickness and the depth of your frame
- Video doorbells — check frame clearance and mounting depth before ordering
Keeping a Permanent Measurement Record
Write down your door slab dimensions, rough opening size, thickness, backset, and hinge placements — and keep that record somewhere permanent. A card taped inside a kitchen drawer works perfectly. So does a photo saved in a labeled cloud folder.
The next time you need to replace a lock, upgrade to a smart deadbolt, or swap the whole door, you'll have exact numbers ready without pulling out your tape measure again. For a full walkthrough on how your measurements feed into a broader home security plan, visit our front door measurement guide.
Frequently Asked Questions
What is the standard size for a front door?
Most modern single-entry front doors are 36 inches wide and 80 inches tall, with a thickness of 1¾ inches. Older homes sometimes have 32" wide doors. Double entry doors typically range from 60" to 72" wide. Always measure your actual opening — never assume it matches a standard size, especially in homes built before 1980.
Do I measure the door slab or the door frame?
It depends on what you're ordering. Measure the door slab if you're buying a slab-only replacement. Measure the rough opening — the structural framing in the wall — if you're ordering a pre-hung door unit that includes its own frame. Both measurements are useful, so take them all while you have your tape measure out.
How do I measure the rough opening for a front door?
Measure the width between the two jack studs (the inner vertical framing members on each side of the opening) at the top, middle, and bottom. Measure the height from the subfloor to the underside of the header at three points. Use the smallest number for each dimension. A rough opening should be about 2 inches wider and 2 inches taller than the door slab you're installing.
What tools do I need to measure a front door?
You need a metal tape measure — cloth tape stretches and gives inaccurate readings. Bring a pencil and notepad to record all three measurements at each point. A carpenter's level and a square are useful for checking whether your frame is plumb and square. That's it — no specialized tools required.
What is a backset on a door lock?
The backset is the distance from the door edge (the narrow side) to the center of the lock borehole. The two most common backset measurements are 2⅜ inches and 2¾ inches. You must know your backset before buying any lock — a mismatch means the bolt won't line up with your strike plate and the door won't latch properly.
How do I know if my door frame is square?
Measure both diagonals of the door opening — corner to corner in both directions. If the two diagonal measurements are equal, your frame is square. If they differ by more than ¼ inch, the frame is out of square and you'll need shimming or a framing correction before installing a new door.
How often should I re-measure my front door?
Re-measure before any hardware purchase or door replacement — never rely on old numbers. In homes older than 30 years, check your measurements every 3 to 5 years, and always after significant weather events like flooding or a hard freeze-thaw cycle. Frames shift gradually over time and the numbers do change.
Key Takeaways
- Always measure the door slab and the rough opening separately — confusing the two is the most common and costly ordering mistake you can make.
- Measure width and height at three points each and always order based on the smallest number to ensure a clean fit at every point.
- Door thickness and backset determine which locks, smart hardware, and reinforcement kits will physically fit your door — measure both before shopping for any security upgrade.
- Keep a written record of all your measurements with the date so future replacements or hardware installs take minutes instead of hours.


About Vincent Foster
Greetings, This is Tom Vincent. I’m a home Security Expert and Web developer. I am a fan of technology, home security, entrepreneurship, and DIY. I’m also interested in web development and gardening. I always try to share my experience with my reader. Stay Connected and Keep Reading My Blog. Follow Me: Facebook, Twitter, Pinterest
Now you can get FREE Gifts. Or latest Free Security Cameras here.
Disable Ad block to reveal all the gifts. Once done, hit a button below