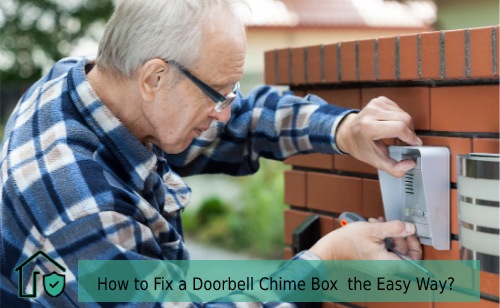
Nearly 30 percent of homeowners deal with a malfunctioning doorbell at some point — and the fix is usually simpler than it looks. If you've been searching for how to fix doorbell chime box problems, you're already on the right track. A broken chime box doesn't mean you need an electrician or a full system replacement. With a few basic tools and about an hour of your time, you can diagnose and repair your doorbell chime box yourself. This guide is part of SecureOne's home repair guides and walks you through the entire process.
Your doorbell chime box is the unit mounted inside your home — usually in a hallway or near the front door — that rings when someone presses the button outside. When it goes silent, it's more than an annoyance. If you're relying on your doorbell as part of your home's security setup, a broken chime is a real gap in your awareness. The good news: most chime box failures trace back to a handful of fixable causes.
Doorbell systems run on low voltage — typically 10 to 16 volts — making them one of the safest DIY electrical repairs you can tackle at home. You don't need to shut off your main breaker in most cases, though switching off the specific doorbell circuit is always a smart precaution. With that in mind, let's dig in.
Contents
- How a Doorbell Chime Box Actually Works
- When to Fix Your Chime Box — and When to Replace It
- Diagnosing Common Doorbell Chime Box Problems
- Five Quick Fixes to Try Right Now
- Pro Tips That Make the Repair Last
- Keeping Your Chime Box Running Long-Term
- Wired vs. Wireless Chime Boxes: What's the Difference?
- Frequently Asked Questions
- Key Takeaways
How a Doorbell Chime Box Actually Works
Before you reach for a screwdriver, it helps to understand what you're working with. A doorbell system is a simple low-voltage circuit — and understanding the basics makes troubleshooting ten times easier. According to Wikipedia's overview of doorbell systems, most residential doorbells operate on a transformer-powered circuit entirely separate from your home's 120-volt wiring.
The Three Main Components
Every wired doorbell setup relies on three parts working together:
- The transformer — Steps down your home's 120-volt current to a safe 10–16 volts. Usually mounted near the electrical panel or on a nearby junction box.
- The button — The push-button unit mounted outside your door. When pressed, it completes the electrical circuit.
- The chime box — The interior unit that receives the signal and produces sound using a solenoid (a small electromagnetic coil) that strikes metal tone bars.
How the Circuit Flows
When someone presses your doorbell, electricity flows from the transformer, through the button, into the chime box, and back to the transformer. The solenoid inside the chime box activates and drives a plunger against the tone bars — that's the "ding-dong" you hear. If any part of this chain breaks down, your chime goes silent. That's why a methodical, component-by-component approach is the fastest path to a fix.
When to Fix Your Chime Box — and When to Replace It
Not every doorbell problem is worth repairing. Sometimes a swap is the smarter call — especially if you're thinking about upgrading to a video doorbell or a connected home system. Here's how to decide.
Signs a Repair Will Do the Job
- The chime worked fine until recently and stopped suddenly
- You can see a loose wire or corroded terminal inside the chime box
- The button is sticky or visibly damaged
- The chime makes a faint or partial sound — one tone instead of two
- Your transformer hasn't been tested in over a decade
If your chime box is under 15 years old and physically intact, a repair almost always makes more sense than a replacement. A new chime unit costs between $15 and $40 — but if the real culprit is a loose $0 wire connection, there's no reason to replace anything at all.
Signs It's Time for a New One
- The chime box housing is cracked or warped from heat
- You want to upgrade to a smart doorbell with app-based notifications
- The unit is 20+ years old and replacement parts are unavailable
- Repairs haven't solved the problem after two or three attempts
If you're considering a full upgrade, our guide on how to install a smart lock on your door is worth a read — smart locks and video doorbells pair naturally as part of a connected front-door security setup.
Diagnosing Common Doorbell Chime Box Problems
This is the heart of knowing how to fix doorbell chime box issues: finding the actual problem before you start replacing parts. Work through these checks in order — start at the simplest point and work backward toward the transformer.
Testing the Transformer
Grab a multimeter (a handheld device that measures voltage) and set it to AC voltage. Touch the probes to the two low-voltage output terminals on your transformer. You should read between 10 and 16 volts. A reading of zero means the transformer has failed and needs replacement — they typically cost $10–$20 and swap in about 15 minutes. If your transformer is mounted directly on the main electrical panel, this is the one step where calling a licensed electrician is a reasonable choice.
Checking the Button and Wiring
Remove the doorbell button from the wall (usually two screws) and disconnect the two wires attached to it. Briefly touch those two wires together. If your chime rings, the button is faulty — not the chime box. Replacement buttons are cheap and available at any hardware store.
While you have the cover off, inspect the wire connections at both the button and the chime box. Look for:
- Loose or disconnected terminal screws
- Corroded or green-tinged wire ends
- Frayed insulation anywhere along the wire run
- Wires that have been kinked or pinched inside the wall
Inspecting the Chime Mechanism
Open the chime box cover — it usually snaps or slides off. Inside, you'll find the solenoid, tone bars (metal rods), and the plunger (the striker). Check these three things specifically:
- Stuck plunger: The plunger should move freely. If it's sticky or gummed up, clean it with a cotton swab and a drop of rubbing alcohol.
- Dirty tone bars: Dust and debris on the bars muffles the sound. Wipe them clean with a dry cloth.
- Loose terminal connections: Each wire attaches to a labeled screw terminal — typically "Front," "Trans," and "Rear." Make sure every wire is firmly seated.
Five Quick Fixes to Try Right Now
Before diving into deeper diagnostics, run through this checklist. These five steps solve the majority of chime box problems without any special tools. Work through them in order before buying any parts.
- Tighten the terminal screws — Open the chime box and snug up every screw terminal with a small flathead screwdriver. Loose connections are the single most common cause of a silent chime.
- Clean the plunger and tone bars — A sticky plunger or dusty bar produces no sound. A quick clean with rubbing alcohol restores the mechanism in minutes.
- Replace the doorbell button — Buttons fail constantly from exposure to rain, UV, and physical use. A $6 replacement button fixes more doorbells than any other single part.
- Check your circuit breaker — Some homes have a dedicated breaker for the doorbell transformer. Make sure it hasn't tripped.
- Bypass the button — Briefly touch the button's two wires together. If the chime rings, your button is the problem — not the chime box.
If you're tackling other entryway repairs at the same time, our guide on how to fix a door knob yourself follows the same methodical DIY approach and covers the most common mechanical failures around your front door.
Pro Tips That Make the Repair Last
Once you've fixed the immediate problem, a few extra steps will keep it from coming back. These are the habits that separate a two-month patch job from a multi-year solution.
Label Your Wires Before Disconnecting
Use masking tape and a pen to label each wire before you remove it from a terminal. Chime box terminals are labeled "Front," "Trans," and "Rear" — but mixing up wires causes erratic behavior. Two minutes of labeling saves a lot of guesswork later.
Use the Right Wire Gauge
Doorbell wire is typically 18-gauge or 20-gauge. Using thicker wire than the terminal is designed for creates connection problems — the wire won't seat properly in the small terminal screws. If you need to splice or replace a wire run, match the existing gauge exactly.
Don't Overtighten the Terminal Screws
It's tempting to crank down hard on terminal screws to be sure they're secure. But overtightening can crack the terminal block or cut through the wire insulation. Snug — not tight — is the correct torque for these small screws.
Consider Replacing an Aging Transformer
Older transformers often output lower voltage than their rated specification. A weak transformer produces a weak signal — your chime rings softly or fires only occasionally. A new 16-volt transformer costs about $15 and can revive an otherwise perfectly good chime box without any other repairs needed.
Keeping Your Chime Box Running Long-Term
A properly maintained doorbell chime box can last 20 to 30 years without issue. The maintenance routine is minimal — about 15 minutes once a year is all it takes to keep the system reliable.
Annual Inspection Checklist
- Remove the chime box cover and clear out dust with canned air
- Check all terminal screws for tightness
- Inspect the exterior button for cracks, corrosion, or water intrusion
- Test the transformer voltage — anything below 10 volts warrants a replacement
- Examine the wiring where it exits the wall for pest damage or moisture
Protecting the Exterior Button
The doorbell button is the most exposed component in the system. Rain, direct sunlight, and freezing temperatures all shorten its life. A weatherproof button rated for outdoor use extends replacement intervals significantly — especially if your front entry lacks an overhang or covered porch. Replacing the button proactively every 10–12 years is far cheaper than diagnosing a system that suddenly stops working.
Since you're already thinking about front-entry security, it's worth reviewing our guide on how to replace a front door lock with a keyed deadbolt — a strong lock and a functioning doorbell are your two most visible deterrents at the front of your home.
Wired vs. Wireless Chime Boxes: What's the Difference?
If you're shopping for a replacement or wondering whether a wireless upgrade makes sense, this side-by-side comparison covers everything you need to know. Both types have genuine advantages — the right choice depends on your home's existing setup and your priorities.
| Feature | Wired Chime Box | Wireless Chime Box |
|---|---|---|
| Power source | Hardwired transformer (10–16V) | Batteries or plug-in adapter |
| Reliability | Very high — no signal interference | Good, but susceptible to RF interference |
| Installation difficulty | Moderate (existing wiring required) | Easy — no wiring needed |
| Average cost | $15–$40 for the chime unit | $20–$60 for the chime receiver |
| Sound quality | Consistent and clear | Varies by brand and range distance |
| Smart home compatibility | Limited (adapter required) | High — many models include Wi-Fi |
| Ongoing maintenance | Minimal — no batteries to change | Batteries need periodic replacement |
| Best suited for | Homes with existing doorbell wiring | New installs or rental properties |
If your home already has doorbell wiring in place, sticking with a wired chime box is almost always the better call. Wired systems are more reliable, cheaper to maintain, and don't depend on battery life. Wireless units shine when you're starting from scratch, renting a space where you can't run new wire, or when smart home integration is a priority.
Frequently Asked Questions
Why is my doorbell chime not ringing at all?
The most common causes are a loose wire connection at the chime box terminals, a faulty doorbell button, or a failed transformer. Start by opening the chime box and tightening every terminal screw. If that doesn't fix it, bypass the button by briefly touching its two wires together — if the chime rings, the button is your problem, not the box.
Can I fix a doorbell chime box without calling an electrician?
Yes, in most cases. Doorbell systems run on low voltage (10–16 volts), making them one of the safest DIY repairs in your home. You can safely handle wiring, terminal connections, and component swaps on your own. The one exception is replacing a transformer mounted directly on your main electrical panel — that step is worth calling a licensed electrician for.
How do I test if my doorbell transformer is working?
Use a multimeter set to AC voltage. Touch the probes to the two low-voltage output terminals on the transformer. A healthy transformer reads between 10 and 16 volts. A reading of zero means the transformer has failed and needs to be replaced.
What does it mean when my doorbell only dings but doesn't dong?
A single-tone chime usually means only one solenoid is activating. This is typically caused by a stuck or dirty plunger inside the chime box, or a loose connection on the "Front" terminal screw. Clean the plunger with rubbing alcohol and check that all wire terminals are firmly tightened.
How long does a doorbell chime box typically last?
A wired doorbell chime box can last 20 to 30 years with minimal maintenance. The exterior button is the component most likely to fail first, due to exposure to weather and sunlight. Replacing the button every 10–12 years is normal, while the interior chime unit itself rarely needs replacement unless it's physically damaged.
Is it worth upgrading to a wireless doorbell chime?
If your home already has doorbell wiring, a wired chime box is more reliable and lower maintenance than a wireless unit. Wireless makes sense when there's no existing wiring, when you're renting, or when you want smart home integration with smartphone notifications. Both options are inexpensive and widely available at hardware stores.
Is it safe to touch doorbell wires?
Yes — doorbell wires carry low voltage (10–16 volts), which poses no meaningful shock risk. You won't be harmed by handling the low-voltage wiring at the button or chime box. That said, always switch off the circuit at your breaker before working near the transformer itself, since it connects directly to your home's 120-volt supply.
Key Takeaways
- Most doorbell chime box failures trace back to a loose wire connection, a faulty button, or a dead transformer — all fixable without an electrician using basic tools.
- Always diagnose in order: bypass the button first, then test the transformer voltage, then inspect the solenoid and plunger inside the chime box.
- A wired chime box maintained with a quick annual inspection can last 20 to 30 years, making it one of the most cost-effective components in your home.
- If you're upgrading, a video doorbell paired with a deadbolt or smart lock gives you comprehensive, layered security at your front entry.


About Vincent Foster
Greetings, This is Tom Vincent. I’m a home Security Expert and Web developer. I am a fan of technology, home security, entrepreneurship, and DIY. I’m also interested in web development and gardening. I always try to share my experience with my reader. Stay Connected and Keep Reading My Blog. Follow Me: Facebook, Twitter, Pinterest
Now you can get FREE Gifts. Or latest Free Security Cameras here.
Disable Ad block to reveal all the gifts. Once done, hit a button below