Last summer, a friend of mine stood on my porch for nearly four minutes before knocking — because my doorbell button had stopped completing the circuit and I had no idea. It's the kind of problem that feels embarrassing in retrospect, but it taught me something useful: most homeowners have no real sense of how does a doorbell work until the moment it stops working. This guide, part of our broader home improvement and security resource library, covers the full picture — from the wiring inside your wall to the Wi-Fi chip inside a modern smart doorbell.

A doorbell sits at the intersection of convenience and security. It's your first alert that someone is at the entry point of your home — and in a world where smart locks, video cameras, and alarm systems are increasingly connected, the doorbell is often the first component in that ecosystem. Understanding what's happening inside that small button and chime box gives you the knowledge to upgrade confidently, troubleshoot accurately, and integrate your doorbell into a smarter home security setup.
Whether you're working with a classic wired chime, a battery-powered wireless unit, or a full video doorbell with two-way audio, the underlying logic is consistent. The system has three jobs: detect a press, transmit a signal, and produce an alert. How it accomplishes those three jobs depends entirely on the type you have — and each approach has real tradeoffs worth understanding.
Contents
The Anatomy of a Doorbell: How the Mechanism Actually Works
At its core, a traditional wired doorbell is a low-voltage electrical circuit. Your home's standard 120V AC power runs through a transformer — typically mounted on your circuit breaker panel or near the chime box — which steps the voltage down to a safe range of 8 to 24 volts. That low-voltage current flows through a wire to your outdoor button, continues to your indoor chime unit, and returns to the transformer to complete the loop. The entire path is always live and waiting.
The Button and the Electrical Circuit
The button itself is simply a momentary contact switch. When nobody is pressing it, a small spring holds the contacts apart and the circuit stays open — no current flows. The moment you press the button, the contacts touch, the circuit closes, and current rushes through to the chime unit. The second you release the button, the spring separates the contacts again and the circuit breaks. That's the complete mechanical story of the button: open, close, open.
How the Electromagnet Creates the Chime
Inside the chime box, things get more interesting. Most traditional units use an electromagnet — a coil of wire wrapped around an iron core. When current flows through that coil, it generates a magnetic field that pulls a small metal plunger (called a piston or striker) rapidly toward the magnet. That piston strikes one of the metal tone bars inside the unit, producing the first note of the "ding-dong" sound you hear.

When you release the button and the circuit breaks, the magnetic field collapses. A return spring pushes the piston back — and as it retreats, it strikes the second tone bar, producing the "dong." The two-note chime is entirely the result of the piston's forward strike and spring-driven return. According to the Wikipedia overview of doorbell technology, this electromagnetic striker design has remained essentially unchanged for over a century, which explains why a doorbell from the 1960s and one from 2005 are electrically interchangeable.
Wired, Wireless, and Smart: What Sets Each Type Apart
Once you understand the basic electromagnetic principle, the differences between doorbell types become easier to evaluate. Each solves the same three-part problem — detect, transmit, alert — using a different technology stack.
Traditional Wired Doorbells
Wired doorbells are reliable by design. There are no batteries to replace and no radio interference to worry about. As long as your transformer is functioning and the wiring is intact, the system works. The single most common failure point in a wired doorbell is the transformer — they can wear out after years of continuous use, and a simple multimeter test will tell you immediately if it's outputting the correct voltage. If you're comfortable working with low-voltage wiring, replacing a transformer is a straightforward job similar in complexity to installing a front door handle set.
Wireless Doorbells
A wireless doorbell replaces the physical wire run between button and chime with a radio frequency signal — typically 433 MHz or 868 MHz. When you press the button, a small battery-powered transmitter inside the button unit sends a coded RF burst to the receiver plugged into an outlet inside your home. The receiver decodes the signal and triggers a speaker to play a chime tone. There's no electromagnet and no transformer — just radio communication and a digital audio file.
Smart Video Doorbells
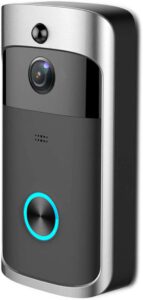
Smart doorbells like Ring, Nest, or Eufy add a camera, microphone, speaker, and Wi-Fi chip to the equation. When someone presses the button — or when motion is detected — the device streams video to your smartphone app and sends a push notification. Motion detection operates independently of the button press, which is what makes smart doorbells genuinely useful for security rather than just convenience. If you're already running smart locks, pairing them with a video doorbell makes sense — our guide to the best HomeKit smart locks covers compatible options if you're in the Apple ecosystem, and we also have a roundup of the best smart locks for Google Home if you run Android. Because smart doorbells connect to your home network, it's worth reading our breakdown of whether home security systems can be hacked before you set one up.
Pro tip: Smart doorbells set to "maximum sensitivity" motion detection will flood you with notifications from passing cars. Start at medium sensitivity and adjust down — you'll catch actual visitors without the noise.
What a Doorbell System Actually Costs
Price varies dramatically across doorbell types, and the sticker price on the box rarely tells the full story. Here's a realistic breakdown of what you'll spend, from basic hardware to a fully installed smart system.
Upfront Hardware Costs
| Doorbell Type | Hardware Cost | Ongoing Cost | DIY-Friendly? | Best For |
|---|---|---|---|---|
| Basic Wired Chime | $15–$40 | None | Yes | Simple reliability, no frills |
| Wireless RF Doorbell | $20–$60 | AA/AAA batteries (~$5/yr) | Yes | Renters, no existing wiring |
| Wired Smart Doorbell | $100–$250 | Cloud subscription $30–$100/yr | Moderate | Full security integration |
| Battery Smart Doorbell | $80–$200 | Battery recharge + subscription | Yes | No wiring available |
| Pro-Grade Video Doorbell | $200–$400+ | $100–$200/yr | Difficult | High-traffic homes, business use |
Installation and Hidden Fees
If your home already has doorbell wiring, installing a new wired unit yourself takes about 20 minutes. Professional installation typically runs $75 to $150 for a straightforward job. Where costs creep up is when your transformer needs upgrading — many older homes have 8V transformers, and most modern smart doorbells require at least 16V to charge their internal battery or power the camera reliably. A transformer upgrade adds $30 to $80 in parts and another $50 to $100 in labor if you hire it out.
Cloud storage subscriptions are the other cost most buyers underestimate. Without a plan, many video doorbells only provide real-time viewing — no recorded history. For a doorbell to function as a meaningful security tool, you need clip storage. Factor that annual fee into your total cost of ownership before you buy.
Simple Improvements You Can Make Today
You don't need a full system overhaul to get meaningfully more out of your existing doorbell. A few targeted improvements can solve the most common frustrations without spending much time or money.
Upgrading Your Chime
If your existing chime is weak, buzzy, or skips its second tone, the fix is usually replacing the chime unit itself rather than diagnosing the electromagnet. Chime replacement is a 15-minute job — two wires, two screws. A new chime unit under $30 can dramatically change how responsive your doorbell feels without touching the button or transformer. If you want to explore your options before buying, our roundup of the best doorbell chimes covers units for every budget and chime style, from classic two-tone to multi-melody digital units.
Adding a Backup Notification
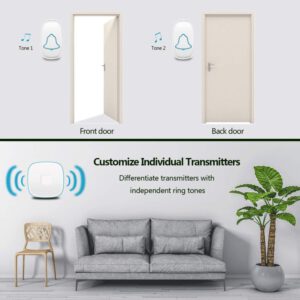
One underused improvement for wired doorbells is adding a wireless plugin receiver as a secondary chime. These units pair to a small transmitter wired in parallel with your existing chime. The result: your original chime still rings, but you also get an outlet-powered receiver in your home office, garage, or bedroom — wherever the original chime can't be heard clearly. No new wiring required on the button side. It's an inexpensive fix that solves a real problem in larger homes.
Doorbell Myths That Lead Homeowners Astray
A surprising amount of doorbell advice floating around is wrong. Two myths in particular cause homeowners to make the wrong purchasing decision or skip repairs they could handle themselves.
Wireless Is Always Easier
Wireless doorbells are easier to install, but they are not simpler to maintain. Battery-powered transmitters drain faster in cold weather, and the coding between button and receiver can be disrupted by other RF devices in a dense neighborhood. Wired doorbells, once installed, require almost zero maintenance. If your home has existing doorbell wiring that works, keeping a wired system is almost always the lower-hassle long-term choice. Wireless makes sense when there's no wiring — not as a default upgrade over wired.
Smart Doorbells Are Only for Tech Enthusiasts
The idea that smart doorbells require technical expertise is outdated. Modern units from Ring, Nest, and Eufy walk you through setup with a phone app in under ten minutes. The harder question isn't how to install one — it's whether the privacy and subscription tradeoffs are worth it for your specific situation. A camera at your front door records visitor activity, which has legal and social implications worth thinking through. That's not a technical barrier; it's a personal one. The installation itself is genuinely accessible to any homeowner who can use a screwdriver.
Frequently Asked Questions
How does a doorbell work without electricity?
Wireless and battery-powered doorbells operate without a hardwired connection to your home's electrical system. They use AA or AAA batteries to power a small RF transmitter in the button unit, which sends a radio signal to a receiver plugged into a standard outlet inside your home. No transformer or low-voltage wiring is required.
Why does my doorbell only ring once instead of twice?
A single-tone chime usually means the return spring inside the chime unit is weak or the plunger is sticking. When current stops flowing, the spring should push the piston back to strike the second tone bar. If the spring has lost tension or the piston is corroded, it stalls and you only hear "ding" without the "dong." Replacing the chime unit is the fastest fix.
Can a doorbell electrocute you?
A standard doorbell transformer steps voltage down to 8–24V AC, which is too low to cause a dangerous shock under normal circumstances. You may feel a mild tingle if you touch a live wire, but it is not hazardous. Always turn off the circuit at the breaker before working on wiring as a precaution — not because the voltage is lethal, but because good practice matters.
What voltage does a doorbell transformer use?
Most residential doorbell transformers output between 8V and 24V AC. Older systems commonly run at 8V or 10V, which is insufficient for modern smart doorbells. If you're upgrading to a video doorbell, check the manufacturer's minimum voltage requirement — most need at least 16V, and some require 24V. Replacing a transformer costs $15–$30 in parts and takes about 30 minutes.
How far can a wireless doorbell signal travel?
Most wireless doorbells advertise a range of 300 to 500 feet in open air. Inside a home with walls, floors, and appliances blocking the signal, the effective range drops significantly — typically to 50 to 150 feet depending on construction materials. Thick concrete or brick walls absorb RF signals more than standard wood-frame construction. Position your receiver as close to the button as the layout allows.
Do smart doorbells work if the internet goes down?
Most smart video doorbells lose their remote notification and recording capabilities when Wi-Fi goes down. The button press may still trigger your existing chime if the doorbell is wired in parallel, but you won't receive phone alerts or video. Some higher-end models support local storage on a microSD card that continues recording even without an internet connection.
How long do wireless doorbell batteries last?
Battery-powered doorbell buttons typically last six months to two years on a set of batteries, depending on press frequency and temperature. Cold weather dramatically reduces battery performance — a unit that lasts 18 months in mild climates may need replacement every four to six months during a harsh winter. Lithium batteries outperform alkaline in cold conditions and are worth the extra cost if you live in a cold climate.
Can I replace a wired doorbell with a smart doorbell myself?
Yes. If your home has existing two-wire doorbell wiring and a functioning transformer outputting the required voltage, installing a wired smart doorbell is a DIY-accessible project. Turn off the circuit, connect the two wires to the labeled terminals on the new unit, mount it, restore power, and follow the app setup. The process is comparable in complexity to replacing a light switch and takes most people under 30 minutes.
Next Steps
- Test your transformer voltage with an inexpensive multimeter before buying any new doorbell — if it reads below 16V and you want a smart doorbell, budget for a transformer replacement at the same time.
- Decide on your chime setup — if your current chime sounds weak or inconsistent, replace it before assuming the button or transformer is the problem. Browse our best doorbell chime guide to find a compatible unit for your voltage range.
- Audit your entry security as a whole — a doorbell is one piece of your front-door security layer. Evaluate whether your lock hardware is at the same level as your doorbell upgrade; our guides on smart locks are a logical next read.
- Check your Wi-Fi signal strength at your front door if you're considering a smart doorbell — a weak signal there will cause connection drops and delayed notifications that undermine the whole point. A Wi-Fi extender or mesh node placed near the entry often solves this before it becomes a frustration.
- Review cloud subscription terms before you buy any video doorbell — confirm whether the features you need (clip history, person detection, package alerts) are included in the base plan or require an additional monthly fee.


About Vincent Foster
Greetings, This is Tom Vincent. I’m a home Security Expert and Web developer. I am a fan of technology, home security, entrepreneurship, and DIY. I’m also interested in web development and gardening. I always try to share my experience with my reader. Stay Connected and Keep Reading My Blog. Follow Me: Facebook, Twitter, Pinterest
Now you can get FREE Gifts. Or latest Free Security Cameras here.
Disable Ad block to reveal all the gifts. Once done, hit a button below