According to the FBI Uniform Crime Reporting Program, a residential burglary occurs in the United States approximately every 25.7 seconds — and a significant share of those incidents exploit doors with seized or compromised lock mechanisms. If you need to fix a door lock that won't turn, you are addressing one of the most common and most consequential home security failures a homeowner can face. A lock that refuses to rotate is not merely an inconvenience; it represents a direct gap in your home's first line of defense. The good news is that the cause is rarely catastrophic, and a systematic approach will restore full function in most cases.
Understanding the root cause is your first priority. Door lock failures span a wide spectrum — from simple lubrication deficiency to worn internal components that demand full replacement. A review of the most common door lock problems reveals recognizable patterns: stiffness when inserting the key, partial rotation, a key that turns without retracting the bolt, or a thumb-turn (the interior rotating lever on a deadbolt) that spins freely without mechanical effect. Pinpointing your specific symptom narrows your repair path considerably and prevents wasted effort on the wrong fix.
This guide walks you through every stage of the repair process — from diagnosing the failure mode to executing a permanent fix and building a maintenance routine that prevents recurrence. Whether you own a traditional keyed deadbolt, a knob-and-latch set, or a connected smart device, understanding how door knob mechanisms work internally makes every step below far more intuitive.
Contents
- Why Door Locks Stop Turning
- When to Fix It Yourself — and When to Call a Locksmith
- Tools and Materials for the Job
- Quick Fixes to Try Immediately
- Diagnosing and Troubleshooting a Stuck Door Lock
- Long-Term Lock Maintenance Strategy
- DIY Repair vs. Professional Service: Advantages and Drawbacks
- Frequently Asked Questions
- Next Steps
Why Door Locks Stop Turning
A door lock is a precision mechanical assembly. When any single component degrades or misaligns, the entire system can seize. The three most frequent culprits are lubrication failure, key wear, and door frame misalignment. Recognizing which category applies to your situation determines the fastest and least invasive repair route.
Common Internal Causes
- Dry or degraded lubricant: Most residential lock cylinders rely on graphite powder or PTFE (polytetrafluoroethylene — a slippery synthetic compound) to reduce friction between the stacked internal pins and the cylinder housing. Over time, lubricant evaporates, collects dust, or hardens into a gummy residue that binds all moving parts.
- Worn or damaged key: Keys are cut from soft metals that wear with repeated use. A key with flattened cut depths fails to correctly lift the driver pins (the upper pins in a pin tumbler mechanism) to the shear line, preventing the cylinder from rotating.
- Broken internal springs: Each pin stack inside a pin tumbler lock is held in position by a compressed spring. A broken spring causes that pin to rest at the wrong height, blocking the cylinder plug from turning even when the correct key is inserted.
- Corroded cylinder: Exposure to moisture — especially in exterior locks — causes internal metal components to oxidize. Rust expands the cylinder's internal dimensions, tightening all clearances and stiffening rotation.
- Worn cam or tailpiece: The cam (a small metal tab at the rear of the cylinder) connects cylinder rotation to the bolt or latch. A cracked or worn cam allows the cylinder to spin while leaving the bolt completely stationary.
Environmental and Structural Factors
- Door frame misalignment: Wood doors expand and contract with seasonal humidity changes. When the door swells, the bolt presses against the strike plate (the metal plate mortised into the door frame), creating resistance that makes the key or thumb-turn feel stiff or completely immovable.
- Foundation settlement: House settlement shifts door frames over years. Even a two- or three-millimeter shift prevents the bolt from traveling its full designed path into the strike plate opening.
- Extreme cold: Metal components contract in sub-zero temperatures, tightening internal clearances. A lock that operates normally in mild weather may seize entirely in winter without proper lubrication.
When to Fix It Yourself — and When to Call a Locksmith
Not every stuck lock demands the same response. Attempting a complex repair without proper knowledge can worsen the damage — or leave your door unsecured while the problem appears resolved. Use the criteria below to make an informed, confident decision.
Signs You Can Handle the Repair
- The lock turns with significant effort but turns at all
- The problem appeared recently and coincides with a weather change or seasonal shift
- Your key shows visible wear, and a freshly cut duplicate key performs better
- Visible grime, discoloration, or debris appears around the keyway (the slot where the key enters the cylinder)
- The door gap around the frame is uneven, suggesting alignment rather than a lock failure
These are scenarios where lubrication, key replacement, or minor strike plate adjustment resolves the issue entirely. Reviewing a guide such as how to install a deadbolt lock also builds the mechanical familiarity that makes DIY repairs straightforward for any motivated homeowner.
Signs You Need Professional Help
- The cylinder rotates a full 360 degrees without engaging the bolt — indicating a detached or broken tailpiece
- A key fragment has snapped off inside the keyway
- The lock shows evidence of a forced-entry attempt: bent housing, scoring around the keyway, or a cylinder that pulls out with hand pressure
- The lock is a high-security Grade 1 cylinder with a restricted keyway requiring specialized tools
- The lock is installed on a fire egress door — building codes govern egress hardware, and a licensed locksmith must perform or certify any repair
Security Warning: If your lock shows signs of tampering — scratches around the keyway, a loose cylinder, or a cylinder that moves under hand pressure — do not attempt repair. Replace the entire lock immediately and report the incident to local law enforcement.
Tools and Materials for the Job
Assembling the right tools before you begin prevents mid-repair delays and reduces the risk of component damage. Most basic lock repairs require tools already present in a standard homeowner toolkit. Specialized supplies cost very little and are available at any hardware store.
Essential Tools
- Phillips and flathead screwdrivers — for removing the lock body and strike plate from the door
- Needle-nose pliers — for extracting broken key fragments or manipulating small internal components
- Flashlight or phone torch — for inspecting the keyway interior and cylinder condition
- Allen wrench set — for set-screw doorknobs and some electronic lock installations
- Hammer and cold chisel — for enlarging or repositioning the strike plate mortise (the recessed pocket in the door frame)
- Drill with wood bits — if re-chiseling the mortise to a new position requires material removal
Lubricants and Supplies
| Product Type | Best Use Case | Avoid When |
|---|---|---|
| Graphite powder | Pin tumbler cylinders on keyed locks; dry lubricant that does not attract dust or debris | Electronic or smart lock actuators — graphite can damage circuit boards |
| PTFE (Teflon) spray | Deadbolt bolts, latches, and hinges; resists moisture and temperature extremes | High-security restricted cylinders where manufacturer warranty is still active |
| WD-40 Contact Cleaner | Displacing moisture in corroded exterior locks as a preparatory step before lubrication | As a primary lubricant — standard WD-40 formula dries out and increases friction over time |
| Lock de-icer | Frozen padlocks and exterior deadbolts during sub-zero temperatures | Interior locks where freezing is not a factor |
| Silicone spray | Plastic components, weatherstripping, and sliding door mechanisms | Metal-to-metal pin tumbler contacts — less effective than graphite for cylinder interiors |
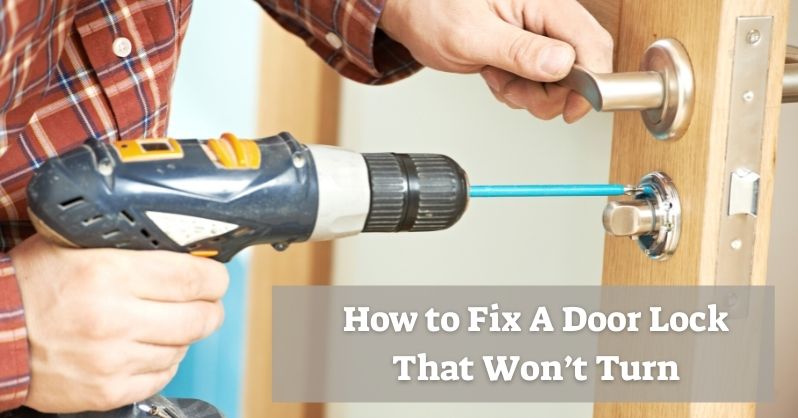
Quick Fixes to Try Immediately
Before disassembling any hardware, work through the fast interventions below. In a majority of stuck-lock cases, a single targeted action — most often lubrication — resolves the problem entirely. Start here before investing time in more involved repairs.
Lubrication: The First Response
- Insert the key halfway into the keyway without attempting to turn it.
- Apply a small, controlled amount of graphite powder or PTFE spray directly into the keyway opening. Do not over-apply — excess lubricant creates a surface that collects dust and debris.
- Withdraw the key fully, then reinsert it several times to distribute the lubricant across all internal pin surfaces.
- Attempt to turn the key using light, steady pressure. Never force it — forcing a seized cylinder can snap the key or damage the internal pins.
- If the lock turns successfully, cycle it open and closed eight to ten times to work the lubricant into all moving surfaces before the repair is considered complete.
If the exterior of the cylinder shows rust staining or corrosion discoloration, a short burst of WD-40 Contact Cleaner dissolves oxidation effectively. Always follow with a proper lubricant application — contact cleaner alone leaves the cylinder unprotected.
Key and Keyway Inspection
- Examine your key under direct light. Look for flattened cut peaks, a bent shaft, or a tip that has worn smooth from years of insertion.
- Try a freshly cut duplicate if one is available. A new duplicate resolves stiffness that a worn original can no longer overcome — and costs only a few dollars at any hardware store.
- Shine a flashlight into the keyway. Visible debris — dried lubricant, compacted dirt, or insect material — should be cleared with a short burst of compressed air before you insert the key or apply lubricant.
- Confirm you are using the correct key for that specific lock. Mixed key sets are a more common source of "stuck lock" service calls than most homeowners expect.
Diagnosing and Troubleshooting a Stuck Door Lock
When the quick fixes above produce no result, a more systematic diagnosis is required. Work through each scenario below in sequence — they progress from simple mechanical causes to more complex structural issues. You may also find it helpful to review our dedicated door lock repair guide for additional diagnostic detail.
Deadbolt Will Not Extend or Retract
A deadbolt (a bolt that extends fully into the door frame under key or thumb-turn power, without spring assistance) that refuses to move frequently indicates a bolt-to-strike-plate alignment conflict rather than a cylinder problem.
- Open the door fully and operate the deadbolt with no frame resistance. If it moves freely with the door open, the problem is alignment — not the lock mechanism itself.
- Apply lipstick or a wax crayon to the bolt tip. Close the door and attempt to engage the bolt. The mark transferred to the strike plate reveals exactly where the bolt is making contact instead of entering the opening.
- If the bolt misses the strike plate opening by 3 mm or less, enlarge the opening with a metal file in the direction indicated by the mark.
- If the misalignment is larger, reposition the entire strike plate. Remove it, chisel the mortise to the correct location, and reinstall using 7–8 cm screws that anchor into the structural stud behind the door frame — this also significantly improves resistance to forced entry.
Key Turns But Lock Does Not Engage
A cylinder that rotates without producing bolt movement indicates a disconnection between the cylinder and the bolt mechanism. This requires disassembly to diagnose.
- Broken cam or tailpiece: Remove the lock cylinder by unscrewing the lock body from the door face. Inspect the cam — the small metal tab at the cylinder's rear. If it is cracked, bent, or missing, replace the cam component or the entire cylinder assembly.
- Detached spindle: In knob-and-latch sets, the spindle (the square metal rod connecting both knobs through the latch body) sometimes slips out of the actuator seat. Disassemble the knob, confirm the spindle is fully engaged in the latch mechanism, and reassemble carefully.
- Electronic actuator or battery failure: If you operate a smart or electronic lock, a depleted battery or failed actuator motor is the most common cause. If you are familiar with changing codes on an electronic door lock, you already know how to access the battery compartment and diagnostic menu. Replace batteries first — this resolves the issue in the majority of electronic lock failures.
Pro Tip: Before reassembling any lock component, rub a candle or bar of soap along the bolt and latch face. The wax coating significantly reduces metal-to-metal friction during the first several hundred cycles after a repair.
Door Frame and Alignment Issues
- Inspect all hinge screws on each hinge plate. Loose hinges allow the door to sag diagonally, pressing the bolt against the lower edge of the strike plate opening. Tighten all screws; replace any stripped ones with longer replacements that bite into fresh wood.
- Check the weatherstripping (the foam or rubber seal running around the frame perimeter) for compression or displacement. Damaged weatherstripping holds the door slightly off its plane, creating pressure at the latch or bolt point that mimics a lock failure.
- If the frame has shifted due to foundation movement or severe wood swelling, professional carpentry intervention is required before any lock adjustment will hold reliably.
Long-Term Lock Maintenance Strategy
A lock that required repair is at elevated risk of future failure without a consistent maintenance routine. Proactive maintenance takes minutes twice per year and prevents the cost, inconvenience, and security exposure of emergency repairs. Keeping your locks in optimal condition is one of the most efficient steps you can take to burglar-proof your home at minimal cost.
Routine Inspection Schedule
- Every six months: Apply fresh graphite powder or PTFE lubricant to all exterior lock cylinders. Test every lock with both the key and the thumb-turn. Tighten all visible screws on lock bodies and strike plates.
- Annually: Inspect all keys for wear. Have duplicates cut from the original lock code at a locksmith — not traced from a worn key, which introduces cumulative cutting error. Check exterior hinges for surface rust and lubricate.
- After extreme weather: Following ice storms or prolonged heavy rain, test all exterior locks immediately. Apply PTFE spray or de-icer to any cylinder showing stiffness before it fully seizes.
- After any security incident: If a break-in is attempted — even unsuccessfully — replace all affected hardware. Forced-entry attempts frequently cause invisible internal damage that compromises future performance without any visible external sign.
When to Upgrade Your Lock
Repair is not always the most logical response. Certain conditions make full replacement the more secure and cost-effective choice:
- The lock is more than ten years old and has required multiple repairs within the past two years
- The existing lock carries a Grade 3 security rating (the lowest residential classification) on an exterior-facing door
- You have recently moved into a home and do not know the full key history of the existing cylinders — rekeying or replacement is the only way to establish exclusive access control
- You want to move to a keyless access system — understanding how to install a smart lock opens a path to both greater convenience and fully auditable access logs
When a door lock fails beyond cost-effective repair and the door itself is aging or compromised, it may also be the right moment to evaluate whether to replace the front door entirely — a step that addresses security, energy efficiency, and curb appeal in a single project.
DIY Repair vs. Professional Service: Advantages and Drawbacks
The choice between handling a lock repair yourself and hiring a licensed locksmith involves cost, skill level, available time, and acceptable risk. Use the analysis below to select the right path for your specific situation.
Advantages of DIY Repair
- Cost efficiency: Most DIY lock repairs cost under $20 in supplies, compared to $75–$200 for a professional service call depending on your region and time of day.
- Speed: With proper knowledge and tools, a basic repair takes 15–30 minutes. Scheduling a locksmith during off-hours or emergencies can add hours of wait time.
- Skill development: Understanding your lock hardware makes you a more capable homeowner and allows you to identify deterioration earlier in future inspections.
- Direct quality control: You oversee every step of the repair and can test the result under your own standards before considering the job complete.
Drawbacks and Risks of DIY Repair
- Damage escalation: Forcing components, using incorrect tools, or misdiagnosing the problem can convert a minor repair into a full cylinder or lock body replacement.
- Hidden security gaps: An improperly reassembled lock may appear functional while offering significantly reduced resistance to attack — a flaw that remains invisible until a break-in attempt.
- Warranty voidance: Disassembling a lock that remains under manufacturer warranty typically voids the warranty entirely.
- Complexity ceiling: High-security cylinders, anti-pick and anti-bump pin configurations, and smart lock actuators require specialized tools and training that are not practical for most homeowners to acquire for a single repair event.
For the majority of residential lock failures — lubrication problems, minor alignment issues, worn keys, and simple cam replacements — DIY repair is the appropriate and efficient choice. For complex failures on high-traffic exterior locks or locks that protect vulnerable entry points, professional service delivers a more reliable and accountable outcome.
Frequently Asked Questions
What is the most common reason a door lock will not turn?
Lubrication failure is the single most frequent cause. Over time, the lubricant inside the cylinder dries out, collects dust, or hardens into a residue that binds the internal pins in place. Applying graphite powder or PTFE spray resolves this issue in the majority of cases without any disassembly required.
Can I use standard WD-40 on a door lock?
Standard WD-40 formula is a water-displacer and solvent, not a long-term lubricant. It provides short-term relief from stiffness but leaves no protective film, which means friction increases again within weeks. Use WD-40 Contact Cleaner only to remove corrosion or debris, then follow immediately with graphite powder or PTFE spray as the primary lubricant.
How do I remove a broken key from a lock cylinder?
Insert a broken-key extractor tool (available at any hardware store) into the keyway alongside the fragment, hook the serrations of the broken piece, and pull steadily outward. If an extractor is not available, needle-nose pliers can grip the fragment if enough of it protrudes from the keyway. Never attempt to push the fragment deeper into the cylinder to dislodge it from the other side — this damages the internal pins.
How do I know if my door is misaligned rather than the lock being faulty?
Open the door completely and operate the lock freely. If the key turns and the bolt extends and retracts without resistance when the door is open, the lock mechanism is functioning correctly and the problem is door or frame alignment. Inspect the gap around the door perimeter when it is closed — an uneven gap indicates the door has shifted, warped, or that a hinge has become loose.
How often should I lubricate my door locks?
Lubricate exterior lock cylinders every six months as part of a standard maintenance schedule. Locks in coastal, high-humidity, or high-pollution environments benefit from lubrication every three to four months. Interior locks in climate-controlled environments typically require attention only once per year, or when stiffness first becomes noticeable.
Is it safe to continue using a lock that is hard to turn?
Using a stiff lock is not immediately dangerous, but it should be addressed without delay. A lock requiring excessive force to operate is under mechanical stress each time it is used, accelerating wear on internal pins, springs, and the cam. More critically, a lock that is difficult to operate under normal conditions may fail entirely under the stress of an attempted forced entry.
When should I replace a lock instead of repairing it?
Replace the lock when it has required multiple repairs within a short period, when it is more than ten years old, when internal damage is too extensive for practical repair, or when you cannot verify the key history after moving into a new home. Upgrading to a higher-grade cylinder or a smart lock at this point provides a meaningful security improvement over simply restoring the original hardware to working order.
Next Steps
- Test every exterior lock on your property today. Insert your key into each cylinder and note any stiffness, partial rotation, or resistance. A stiff lock is a lock that is about to fail — identify it before it becomes an emergency.
- Purchase graphite powder or PTFE spray and lubricate all exterior cylinders. This single step, completed in under ten minutes, resolves the majority of stuck-lock issues and extends the service life of your hardware significantly.
- Inspect your keys for wear and have fresh duplicates cut from the original lock code. Worn keys cause cumulative cylinder damage with every use. A new set of duplicates costs very little and eliminates one of the most common sources of lock stiffness.
- Check your door alignment and hinge screws on all exterior doors. Tighten any loose hinge screws and examine the perimeter gap for uniformity. Correcting alignment now prevents bolt-to-strike-plate conflicts before they worsen with seasonal humidity changes.
- Create a six-month maintenance reminder and schedule an annual lock audit. Set a calendar reminder to lubricate, inspect, and test all locks in spring and fall. If any lock is more than ten years old or has required multiple repairs, include lock replacement in your next home security budget cycle.


About Vincent Foster
Greetings, This is Tom Vincent. I’m a home Security Expert and Web developer. I am a fan of technology, home security, entrepreneurship, and DIY. I’m also interested in web development and gardening. I always try to share my experience with my reader. Stay Connected and Keep Reading My Blog. Follow Me: Facebook, Twitter, Pinterest
Now you can get FREE Gifts. Or latest Free Security Cameras here.
Disable Ad block to reveal all the gifts. Once done, hit a button below